Blog
How to Properly Install and Solder Mueller Copper Fittings
Working with copper is one of those projects that looks intimidating but is actually pretty approachable with the right steps. Whether you’re repairing a water line, adding a new connection, or upgrading an old system, Mueller pipe fittings offer reliability and strength when installed correctly. The key is proper preparation, patience, and a little bit of technique. Once you learn how to fit and solder copper the right way, you’ll get watertight joints that can last decades. Let’s walk through the essentials so you can feel confident tackling your next project. Read on.
How to attach copper fittings?

Attaching copper fittings isn’t complicated, but the precision lies in preparation. You want the pipe and the fitting to fit tightly together with no gaps. Naturally, knowing what Mueller fittings are and how they function makes the installation process much easier. This is also true for picking the right fitting for your project. By avoiding counterfeit fittings in your sourcing and knowing how to properly attach and solder them, you can ensure lasting quality in any project you wish to tackle. Let’s take a closer look at proper connection.
1. Measure & cut the pipe
Accurate measurement is the foundation of a successful copper connection. Mark the pipe carefully and use a tubing cutter instead of a saw. A cutter ensures a smooth, square edge without flattening the pipe, which is crucial for achieving a proper seal. Rotate the tool around the pipe, gradually tightening until it separates cleanly.
2. Deburr the inside & outside
After cutting, sharp ridges called burrs are left behind. These can disrupt water flow and wear down fittings over time. Use a reaming tool, file, or sandpaper to smooth the inner and outer edges of the pipe. Proper deburring not only improves flow but also helps the pipe slide into the fitting without resistance.
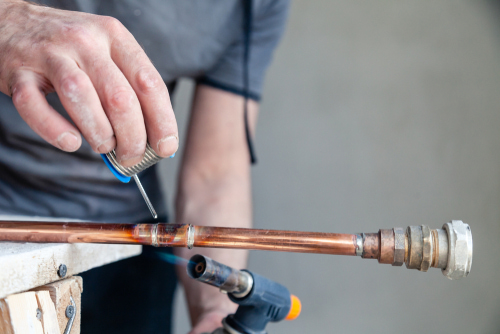
3. Clean the surfaces
Solder only bonds to bright, clean copper. Oxidation, dirt, or grease will prevent the solder from flowing. Use an abrasive cloth, emery pad, or wire brush to shine the pipe’s exterior and the fitting’s interior. Both surfaces should look polished and free of dullness.
4. Apply flux
Flux is essential for preventing oxidation during heating. Apply a thin, even coat on the pipe end only, as too much flux can cause residue buildup. The flux also acts as a guide, pulling molten solder evenly into the joint.
5. Assemble the connection
Insert the pipe into the fitting until it bottoms out. Ensure the fit feels snug but smooth. Perform a dry-fit of all pieces in your layout first, so once heat is applied, you won’t need to adjust anything under pressure.
What is the trick to soldering copper fittings?
Soldering is where most beginners hesitate, but once you understand the rhythm, it becomes second nature. The trick is balancing heat, timing, and solder flow. Keep these points in mind:
- Even heat application: Use a propane torch and move the flame around the fitting, not just in one spot. Heating the joint evenly ensures solder flows properly.
- Test for readiness: When the flux starts to sizzle and bubble, the joint is hot enough for solder. Don’t overheat or the flux will burn off.
- Feed the solder at the seam: Touch the solder to the joint opposite the flame. If the joint is heated correctly, the solder will melt and be drawn into the gap by capillary action.
- Work quickly but carefully: Once solder begins to flow, feed enough to form a small, continuous ring around the joint. Then immediately remove the flame.
- Wipe clean: While still warm, use a damp cloth to wipe away any excess solder for a neat finish.
That’s really the “secret”. Preparation, even heating, and letting the solder naturally flow into the joint rather than forcing it.
Where to find high-quality Mueller pipe fittings near me?
Whether you’re a contractor stocking up for multiple jobs or a homeowner taking on a single repair, using high-quality copper fittings and supplies makes the difference between a quick fix and a long-lasting solution. At Blair Supply, we provide everything you need for your next project, from top-grade fittings and pipe to reliable tools and accessories. Reach out today and find exactly what you need to make your next job a success.